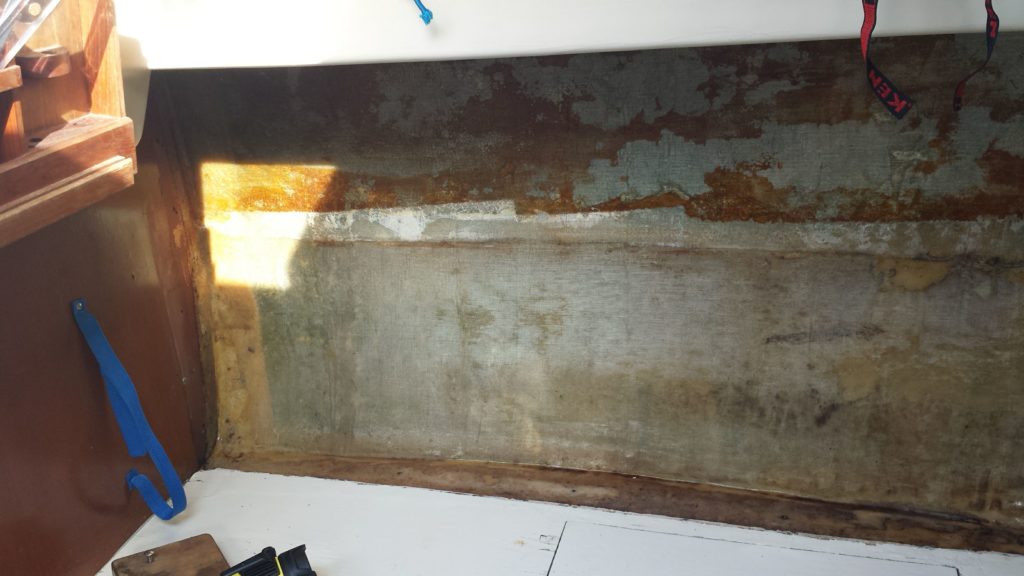
This is the completion of a two-part post on rebuilding the chainplate knee in our Bristol 26. Click here to read Part 1. With the shelf and old chainplate knee out of the way, it was time to start preparing the area for new fiberglass. One benefit of the poorly constructed pieces was that they came completely off without much effort, leaving me very little grinding and sanding to do.
I used cardboard to make new templates for the replacement pieces. Once I made the templates, I could cut the pieces out of plywood at home.
I decided to cut a section of the liner out of the cabin, and butt the new knee against the bottom of the deck. I would bring the knee down to the shelf, making the shelf a part of the support structure.
I also decided to leave the section under the shelf open as well. The old board under the shelf wasn’t doing much other than closing off space and making our sailboat feel a little bit smaller.
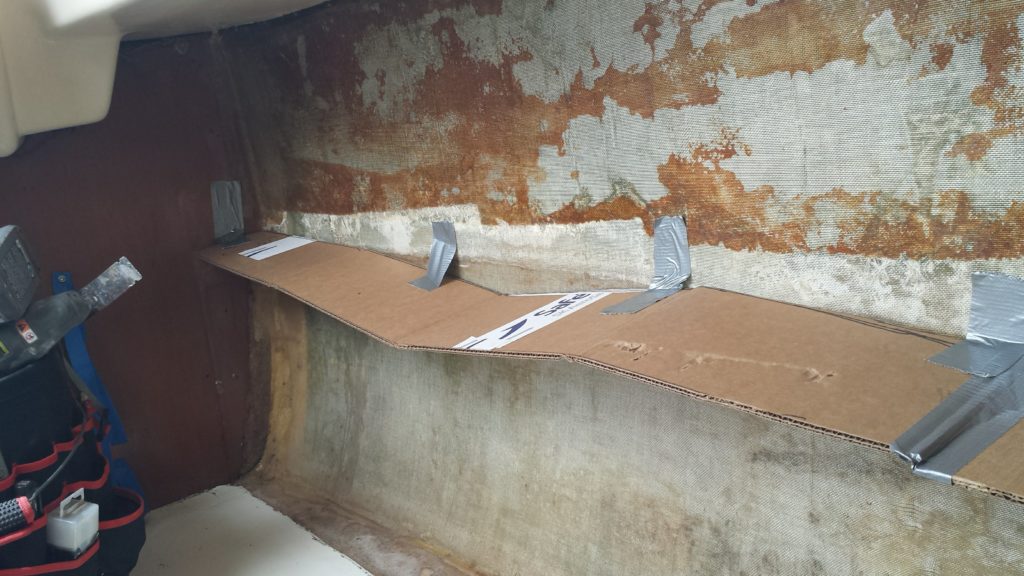
The cardboard templates were easy to make and folded up well for transport, but I might try poster board next time. You can see in the picture that the floppiness of the folded up cardboard made it a bit difficult to make an accurate template.
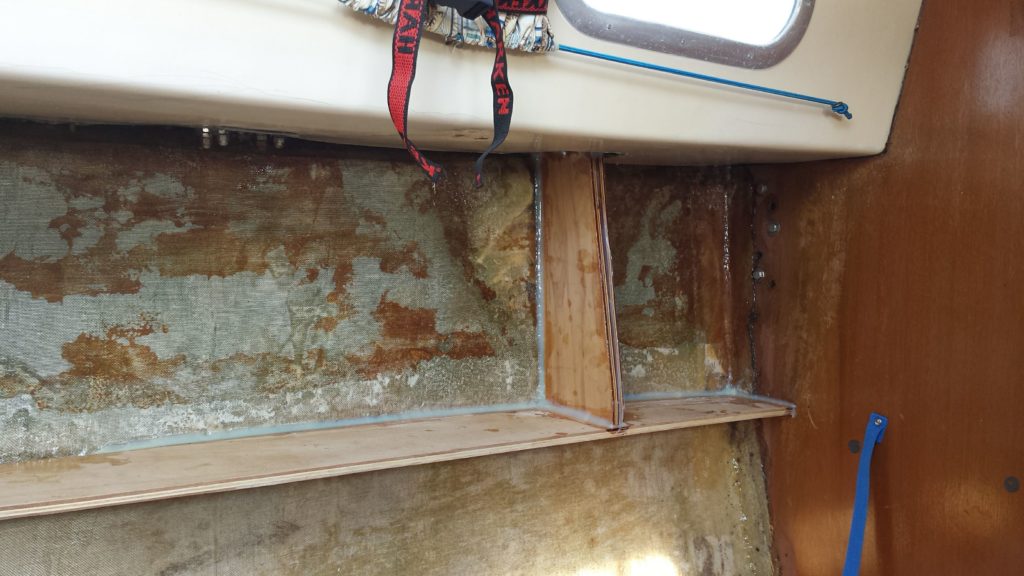
Once I got back to the boat, I had to make a few cuts to the plywood with my multitool and cordless angle grinder with a flap disc on it. It fit reasonably well after that. I mixed up a batch of slightly thickened epoxy, and sandwiched the two boards I cut for the chainplate knee together. Next, I brushed an epoxy layer on to the mating surfaces on the boat and the plywood, then placed the shelf and chainplate knee into position. I supported it with some boards and tools to keep it in place.

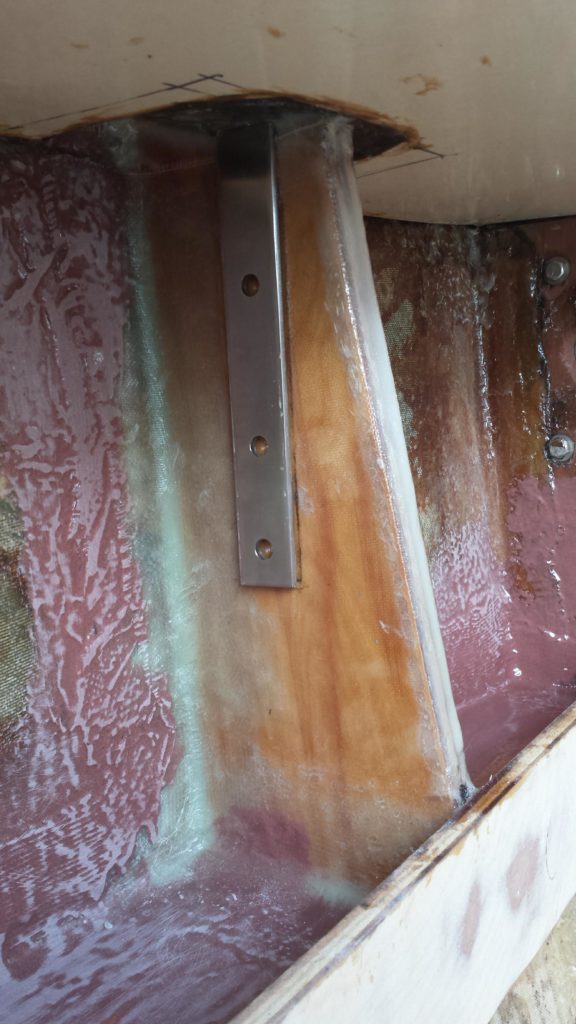
To make a fillet, I used Mas Epoxy’s Gluzilla. It comes in a caulking tube, and mixes in a special nozzle that has an internal corkscrew-shaped mixer in it. It’s more expensive than mixing your own batch, but it’s very convenient, less messy, and nicer looking when finished. I also end up with less waste, as the epoxy is only mixed as it’s used, so I can just throw out the tip when I’m done and keep the rest of the tube for the next project. You can see the difference in texture where I used my own mix of epoxy and filleting blend (the dark brown area).
I used my router to cut a groove in the outer part of the shelf, and, after coating it with unthickened epoxy, attached it to the plywood shelf with screws. I also used Gluzilla to make the fillet for that piece.
If you look at Part 1 of this project, you can see the difference in design from the old chainplate knee, I think this will be much stronger than the original. The shelf is now a structural part of the boat, and the outer shelf ties in with the chainplate knee, which is bonded on all 4 sides–unlike the original design, which was bonded on only one side.
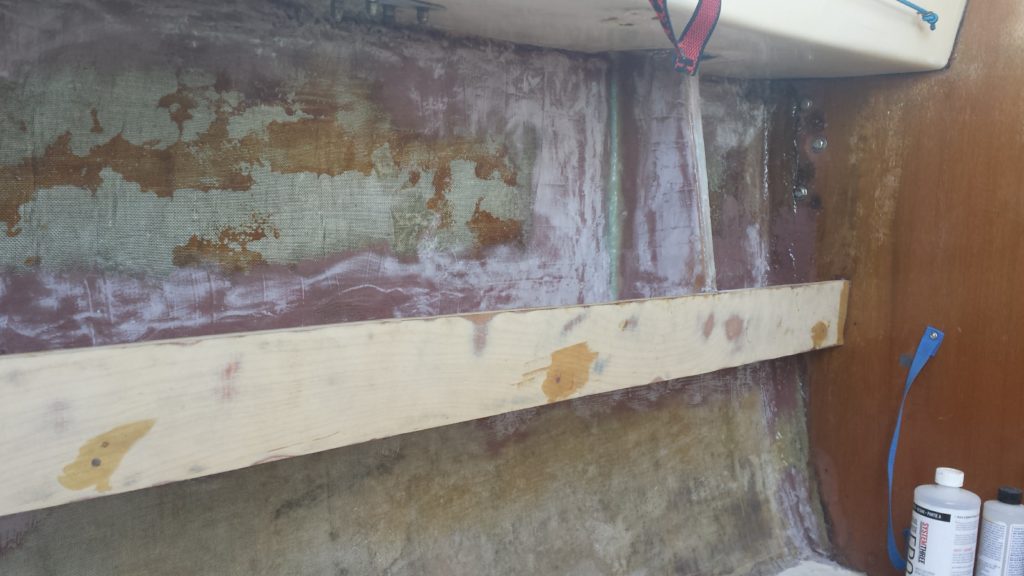
The next time I was at the boat, I applied a few layers of West System 4″ biaxial tape to tab the shelf and chainplate knee into the hull. I then put a skim coat of epoxy resin thickened with West System fairing compound.
The old chainplate didn’t look terrible, but it had some pitting where it passes through the deck, so I bought a piece of 316 stainless flat bar that was the same width but slightly thicker than the old chainplate. The piece of flat bar is enough to make new chainplates for all four lower shrouds, and cost about half as much as buying one pre-made chainplate.
I don’t think I took any pictures of that process, but I basically copied the pattern of the old chainplate, then used my sawzall and bench grinder to shape the new piece. I went slow while grinding and cutting to avoid heating the plate too much, which can change the hardness of the metal and create internal stresses and future cracks.
After making a rough shape, I used a combination of the flap wheel on my angle grinder and wet sanding to polish the new chainplate. I then trimmed the top part off the old chainplate and used it as a backing plate for the bolts that secure it to the chainplate knee.
I drilled oversized mounting holes in the chainplate knee, then filled the holes with thickened epoxy and redrilled them to the proper size. This creates a protective barrier and should keep any water that might leak in from saturating the plywood chainplate knee.
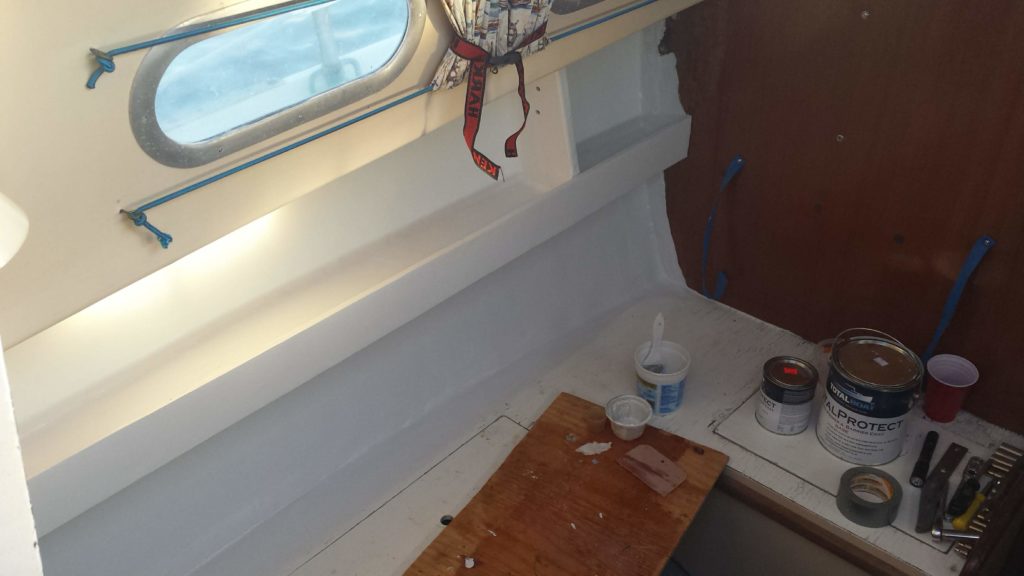
I primered the area with TotalBoat’s TotalProtect epoxy barrier coat. I wanted a durable coating that would keep water out and prevent as many future rot and moisture issues as I can. After that, I applied Sherwin Williams’ Emerald urethane enamel in a beige color I had mixed to match the cabin liner.
I left the bulkhead a bit unfinished, that will be the next part of the project. I’ll have to remove that chainplate and reinforce the area where the bolts pass through the bulkhead. Whoever reinstalled it didn’t use large enough washers on the bolts, and the boltheads are compressing the wood. But that’ll be another project for another day–hopefully over this winter.