Building a Waterproof Light Table for an Aquatic Toxicology Lab
I was asked to come up with a new light table to be used in an aquatic toxicity lab.
The design needed to be:
Portable. The space is limited in the lab, so the new tables should be small enough to sit on a workspace, and could get moved out of the way when they weren’t needed.
Waterproof. The lab uses a lot of water. All the lab work done on the tables uses water samples, so the table must be resistant to water.
Easy to Clean. The old tables had worn wood surfaces that would soak up water. They also had grooves and crevices that trapped dirt and water.
Anti-Fatigue. Lab Technicians spend a lot of time looking at samples on the light tables. The old tables were converted to LED, but some of them flickered, some of them were too bright, and the technicians could see the individual LEDs through some of the tables.
Cost-Effective and Reliable. As with any business, the lab didn’t want to spend a fortune on their equipment, and wanted reliability for daily use.
My Design
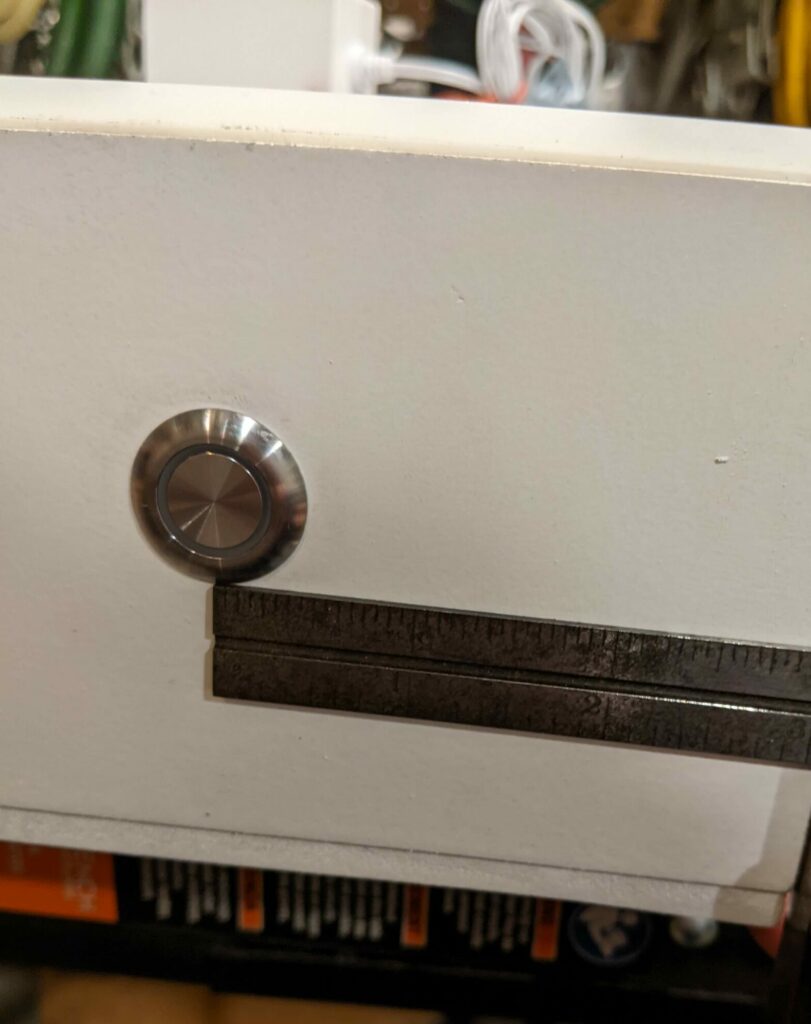
Waterproof dimmable “touch” switch with LED light. The switch can be easily operated, even with gloves on. The dimmable settings allow each Lab Technician to adjust the light output to their preference.
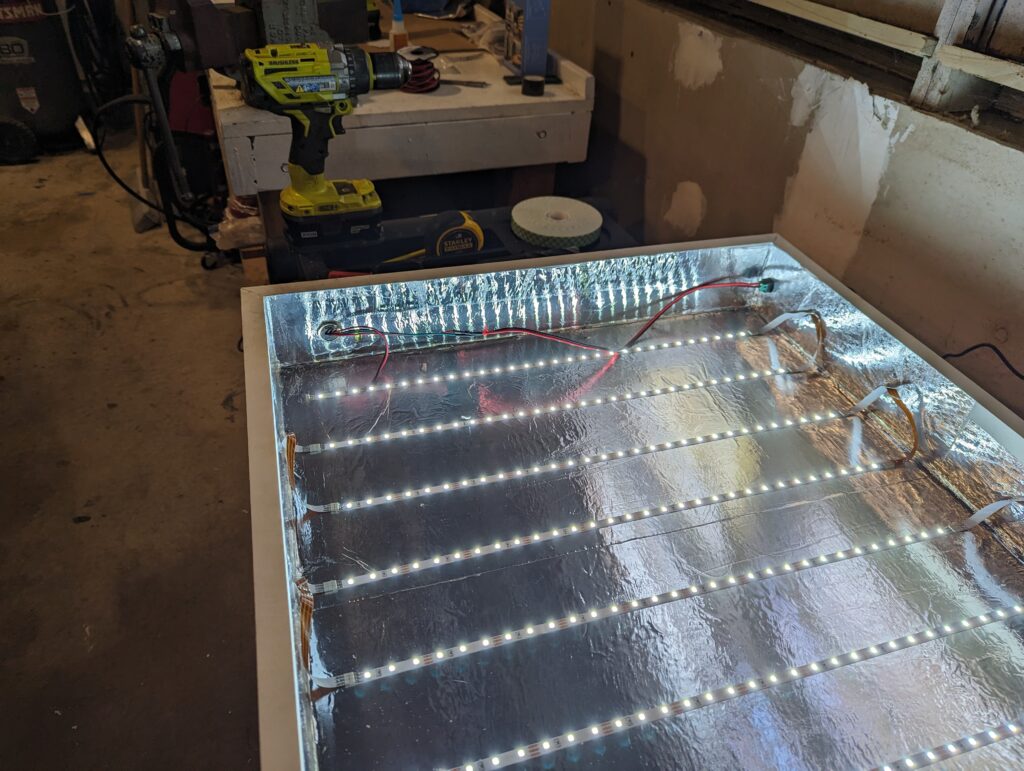
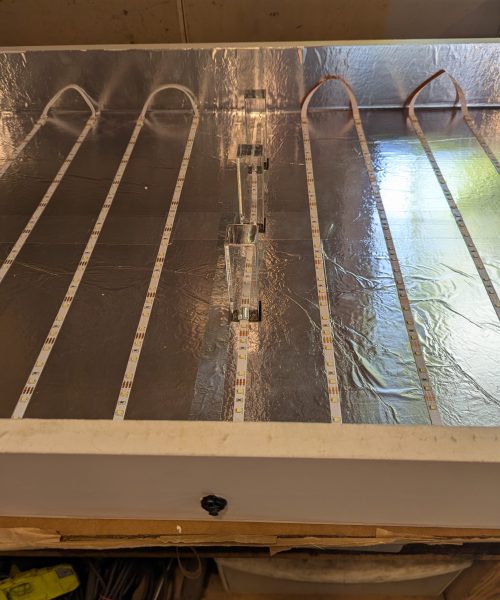
LED Strip lighting. 6000k 12-volt DC white led strips are safe, cool, and disperse light evenly within the reflective foil-lined box. LED strips are readily available and are easily replaced if one fails. A 12-volt wall adapter provides power to the table.
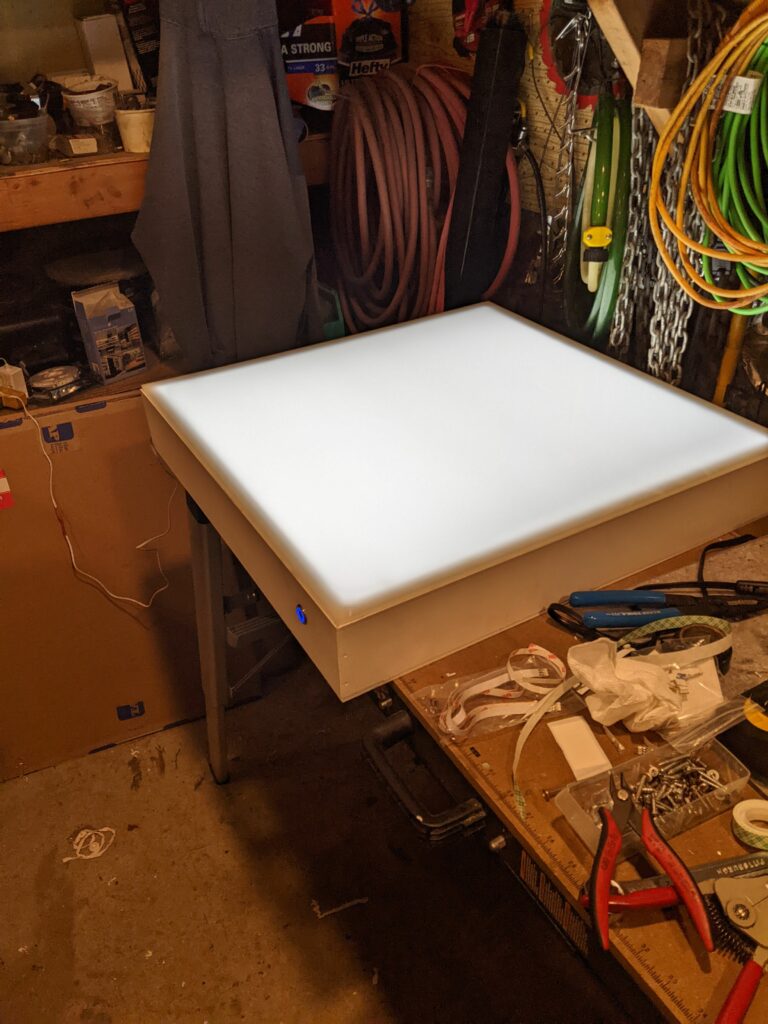
Waterproof Box. The box is constructed with composite frame and bottom, and is sealed to prevent water intrusion. The completed box is painted gloss white for easy cleaning.
Cast Acrylic “lighting-grade” top surface. The top of the table diffuses the light evenly across the table. The top is sealed with foam double-sided tape, which eliminates the need for fasteners on the work surface, and is removable if the table needs service.
The Specifics of the Build:
I used a 24″ x 24″ sheet of “Komatex foamed pvc” for the bottom and a 24″ x 24″ sheet of “Chemcast translucent lighting white acrylic 45%” for the top. Both are available online from TAP plastics.
I used an 8ft “veranda pvc trim board” 1×4 cut into 2 foot lengths for the sides. These are available from Home Depot.
I used a paintable caulk to seal the inside, then sprayed adhesive on the inside and lined them with heavy aluminum foil to provide a reflective backing.
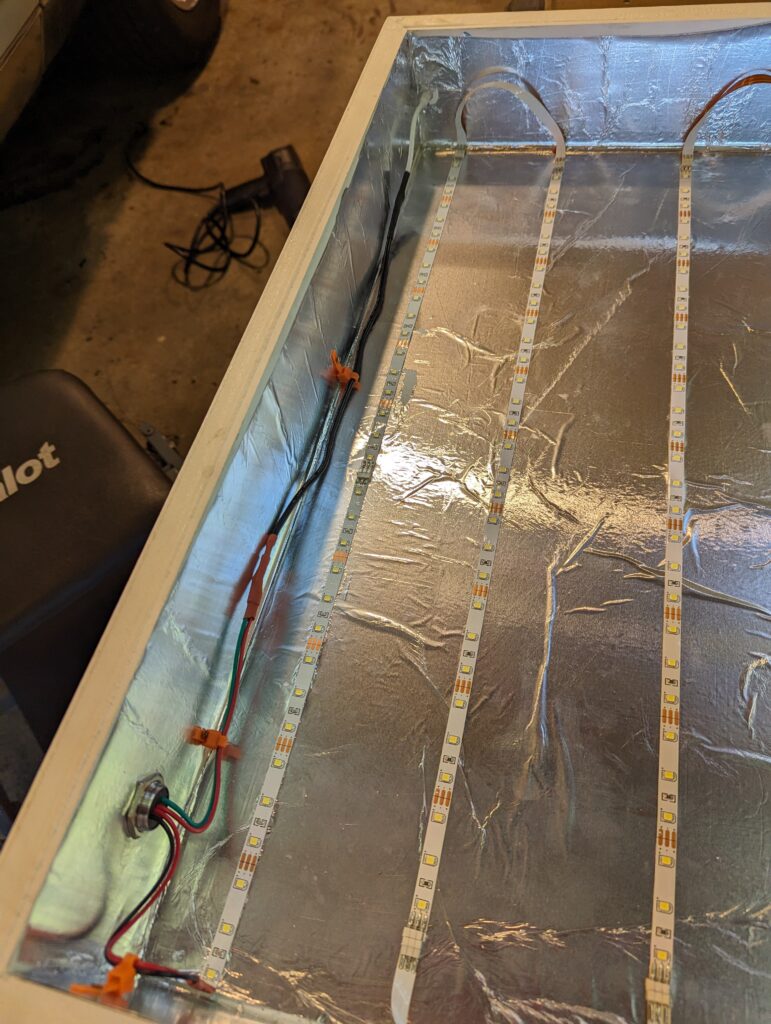
I used 7 20″ strips of “wobane 6000k led light strips” (Available as a 6-pack from Amazon) as lighting In some, I used the supplied ribbon cables, and in others, I soldered wires to connect the strips together.
I used a “ulincos” dimmer switch (from Amazon) and 18ga wire from the switch to the strips.
I sealed the top to the table with scotch mount indoor double sided tape, which seems to do a good job of keeping water out of the table. It’s also easy to remove if the lights need servicing.
I used a 12V 2 amp DC adapter (from Amazon). You can buy them with an adapter included to mount in the light table and attach the table’s wiring to. I used this adapter for most of the tables, then switched to a different style adapter that can’t get pushed through the table.
Sealed dimmable "touch" switch. (ruler is shown for scale).
LED strips and reflective foil backing provide even lighting.
Compact, safe, and simple electronics for reliability and ease of repair.
Variations and Changes
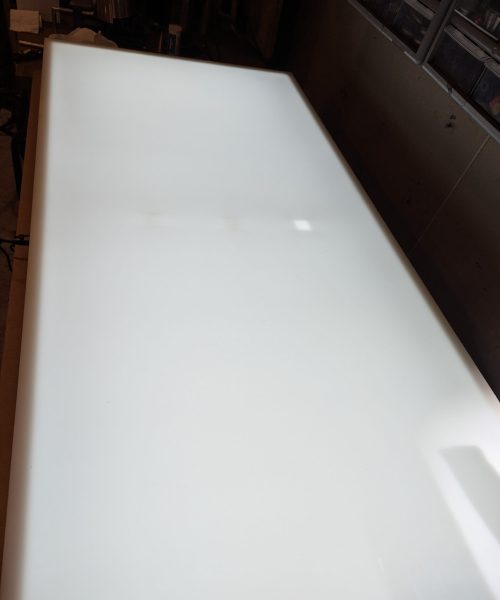
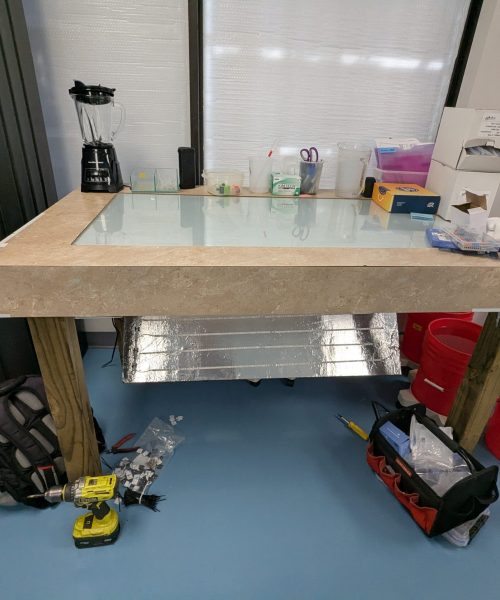
I have also recently built a larger table for a task that required a larger surface, and I retrofitted an old table with the new safer, dimmable, and more consistent 12V DC lighting system. These tables also use simple, easily replaceable components.
One table has been used primarily for crafting and tracing, and another has been used as a layout and marking aid, which shows that the same design can be useful anywhere a bright, even, cleanable work surface is needed.
Building a 4-foot x 2-foot table
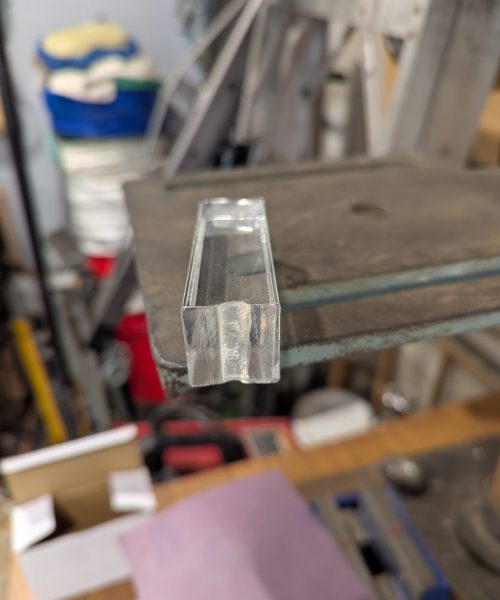
I used three 1-inch x 1 inch clear acrylic rods to support the middle of the table. I used my rotary tool to carve a relief in the bottom of the support that would allow it to fit over a light strip–that way, there wouldn’t be any dark spots in the middle of the table. I also used a 5A AC adapter to power the larger quantity of lights, and a dc jack that has a flange on the outside so it can’t be pushed into the table, which was a problem on a few earlier tables.
Retrofitting an existing table.
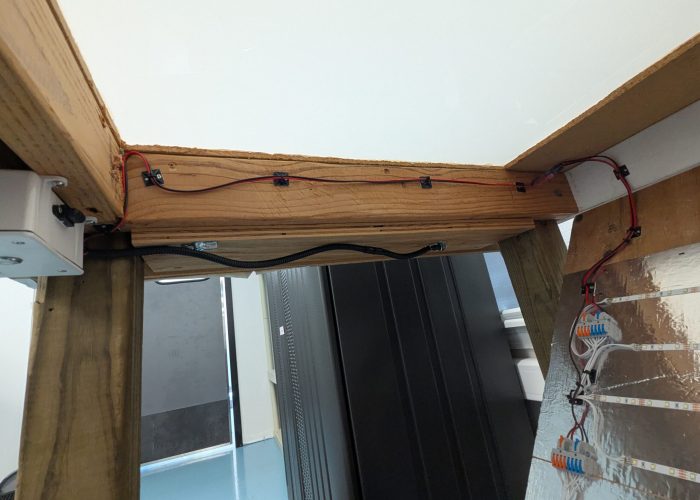
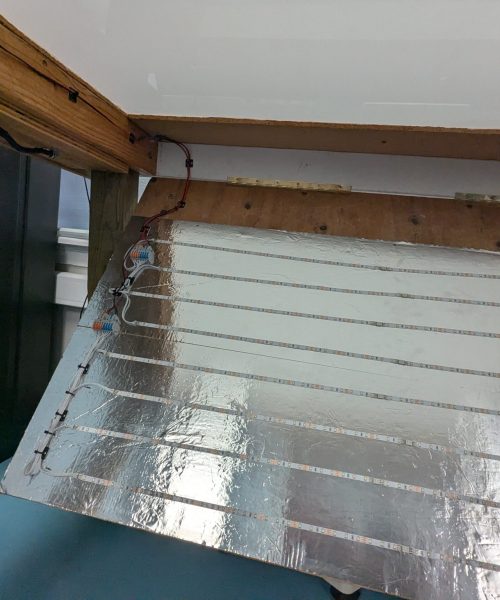
The lab had a table with malfunctioning AC led light tubes, so I replaced them with a similar DC led light setup to the other tables I’ve built. I used a 5A adapter, and a dimmable switch, wiring, and fuse that was mounted/enclosed in an electrical junction box.
I wired the 16 light strips a little differently, connecting sets of two to a terminal block, that were fed through the switch and fuse.
I used the same adhesive spray and heavy aluminum foil as a backing. The new lights seem to dissipate well, and you can’t see the individual lights through the table.
Questions about the Design?
Interested in a similar light table, or looking for details to build your own? Use the Contact Form on the homepage, or email me at joe@overthereef.com.